Sharing Links on Facebook
When you share a URL while creating a Facebook status update, Facebook scans that webpage and automatically generates a preview of that content which includes some useful information in addition to the URL you typed:
- A TITLE for the web page you are sharing
- A brief DESCRIPTION of the content on that page
- An IMAGE from the page

Once you publish your status, these extra bits of information become very important, as they will likely influence whether one of your friends will click on the link. If the image looks intriguing, or if the copy seems interesting, your shared URL will likely be clicked on.
However, sometimes when you share a link, Facebook's automatically generated image, title, and description are either missing entirely or not very compelling. In the post below, notice that there is no associated image or description - just a title and url.

First Step: Learn about the Open Graph Protocol
Facebook describes several open graph tags that it recommends integrating into your site to help Facebook generate previews. The main tags which Facebook uses when generating previews are:
- og:title - the title of the page you are sharing
- og:description - a detailed description of the content on the page
- og:url - the URL of the web page
- og:image - the URL of the image you want shown
- og:site_name - the name of the website you are sharing
- og:type - the type of content you are sharing (blog, website, article, etc)
<meta property="og:title" content="Title of your Page">
Open graph tags are placed in the <head> section of your HTML file. For a complete description of each tag, visit the Open Graph Protocol website.
How Facebook "Sees" your Page
To understand how Facebook ingests a webpage to generate a preview, use Facebook's Open Graph Debugger. This helpful tool will allow you to enter any URL and get a "scrape" of what Facebook finds when it scans the page. It will alert you when there are issues that need to be addressed.

It will also generate a preview to show you how your page will appear if a Facebook user shares it on their timeline.
Time to Fix your Blogger Blog, OG style
In a previous post, I discussed the use of Title and Meta Description tags, which are very important for your blog's SEO. I also described a method of optimizing how Blogger generates title tags to improve your blog's SEO. Read these posts before you go any further!
Because Blogger dynamically generates the pages in our blog based on templates, we thankfully do not need to manually add OG tags to every blog page/post. That would be a major headache! Fortunately for us, we can update a few lines of HTML code in our blog's template that will automatically update all our pages and posts - including any new pages and posts we create in the future.
What we'll be doing is telling Blogger exactly how to handle the TITLE, META DESCRIPTION, and OG tags on 1. your blog's home page and 2. your blog's various posts and pages. We will do this by using IF statements.
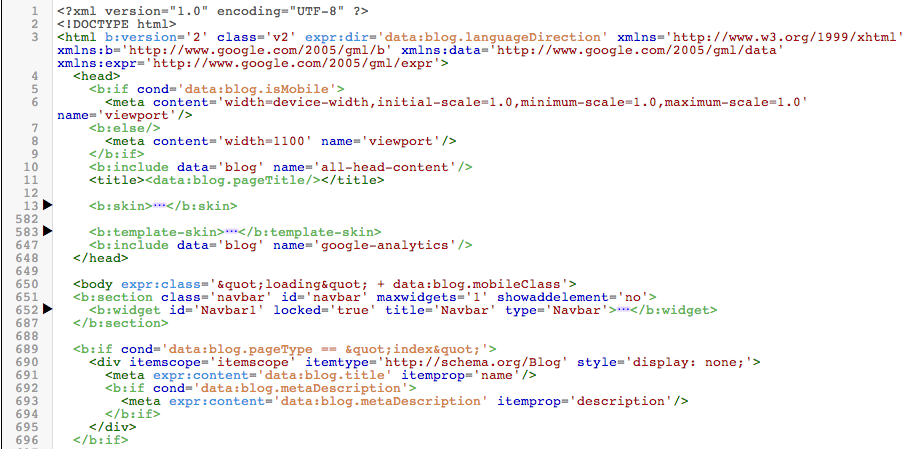
Here is the code you will insert into the <HEAD> section of your Blogger template:
<!--START CUSTOM CODE-->
<meta property='og:url' expr:content='data:blog.canonicalUrl'/>
<meta property='og:title' expr:content='data:blog.pageTitle'/>
<meta property='og:site_name' expr:content='data:blog.title'/>
<b:if cond='data:blog.pageType == "item"'>
<title><data:blog.pageName/> | <data:blog.title/></title>
<meta property='og:image' expr:content='data:blog.postImageUrl'/>
<meta property='og:type' content='article'/>
<b:else/>
<title><data:blog.pageTitle/> - PUT ANY ADDITIONAL TITLE COPY HERE</title>
<meta property='og:image' content='PUT YOUR IMAGE URL HERE'/>
<meta property='og:type' content='blog'/>
</b:if>
<b:if cond='data:blog.metaDescription'>
<meta property='og:description' expr:content='data:blog.metaDescription'/>
</b:if>
<!--END CUSTOM CODE-->
Select this code and COPY it. Then read on.
Important note: before you start editing your blog's HTML code, you'll want to make sure that you are happy with the template you are using. Because we're going to customize the code associated with a specific instance of a template, it is important to realize that if you ever change your template for any reason, you will lose the work you're about to do!
Time to Get Geeky: Come Edit Your Template's HTML with Me
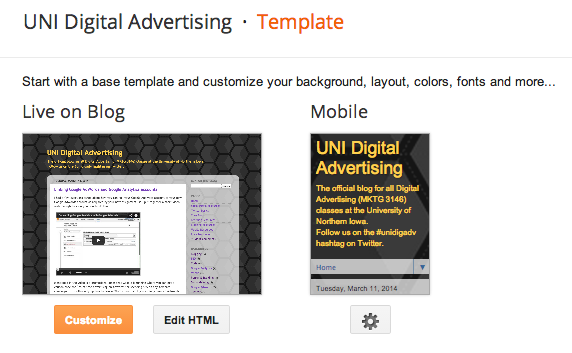
Ready? Let's do this. Go to Blogger and click on your blog. Click on the "Template" button on the left hand menu.
Take a deep breath. Repeat to yourself: "It's just a text file. It's just a text file. I can handle this!"
Now very carefully find the <title> tag that exists in the code. Select the title tag code and everything inside it.
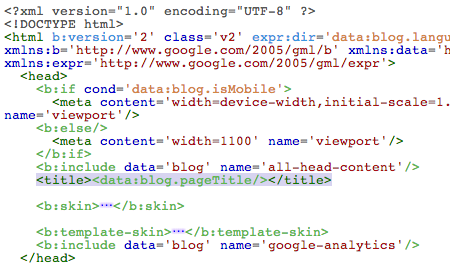
Delete it. Then replace it with the code I gave you earlier in this post.
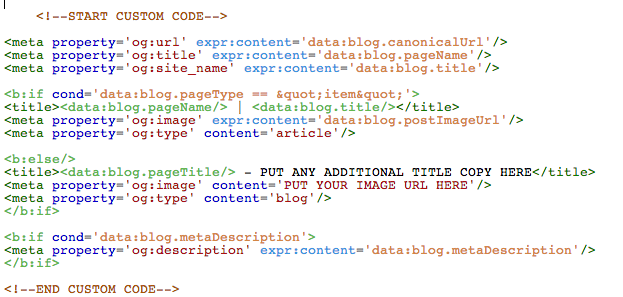
Be sure to carefully EDIT the parts of the code marked "PUT ANY ADDITIONAL TITLE COPY HERE" and "PUT YOUR IMAGE URL HERE".
This code creates og:url, og:title, and og:site_name tags that are dynamically generated from Blogger's page url, Blogger's page title, and your blog's title. It then creates og:image and og:type tags (IF the page is a normal post or page). Otherwise, it creates og:image and og:type tags for your home page which are different. Finally, it creates an og:description tag that is populated from the meta descriptions that you create for your pages.
Once you are done, click "Preview template". If you have made any errors or broken any of the code - it should give you an error message and tell you what the issue is. If your preview looks good, then click "Save Template".
You're Not Done Until You Test Your Pages!
To test your pages, go back to Facebook's Open Graph Debugger and try your pages out. It will give you a preview of how each page will look when shared.

Yeah! That's what I'm talkin' about!
Acknowledgements
I'd like to acknowledge the help of the following two blog posts which helped me greatly in patching together the above code that both improves SEO and adds OG tags to Blogger posts and pages:
Adjust Blogger Title Tags to Improve SEO by Muhammad Faisal
and
How to Add Open Graph Protocol in Blogger Blogs by Muntasir Minhaz
Thanks guys!